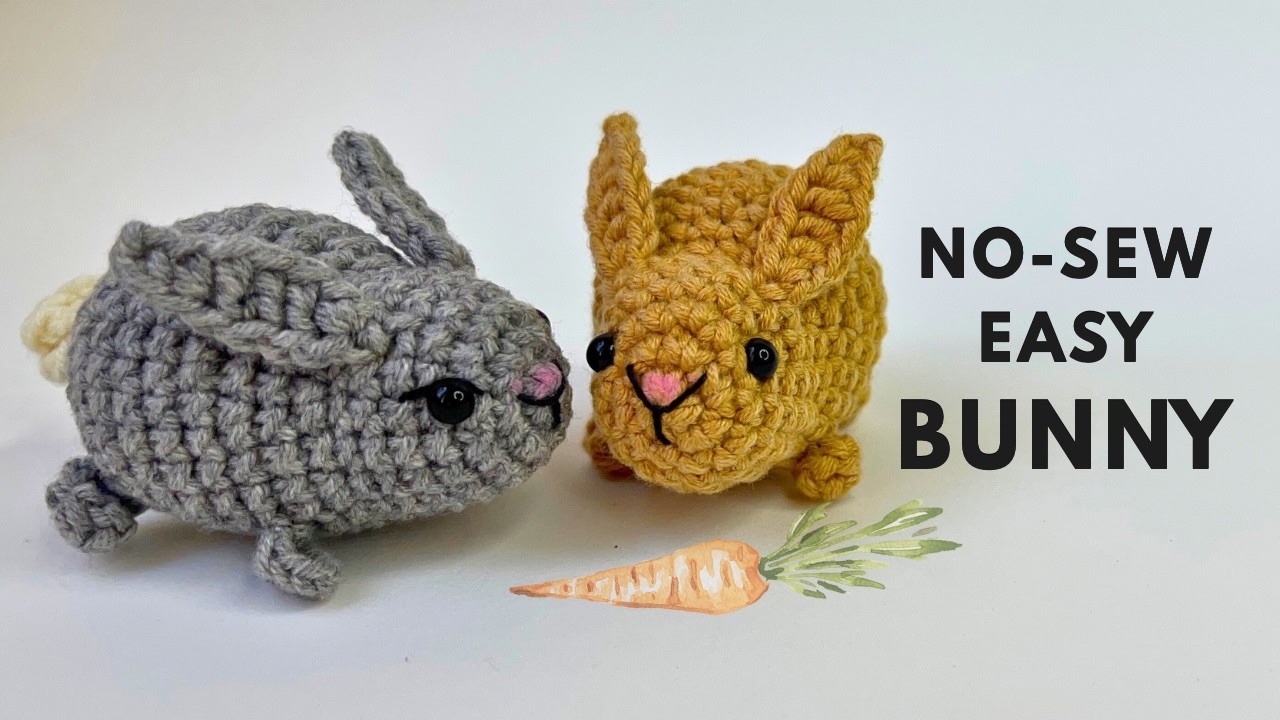
If you love amigurumi but dread the sewing part, this little bunny is for you. Everything is worked in one piece, so you can crochet a no-sew crochet bunny from start to finish without ever threading a needle to attach a limb.
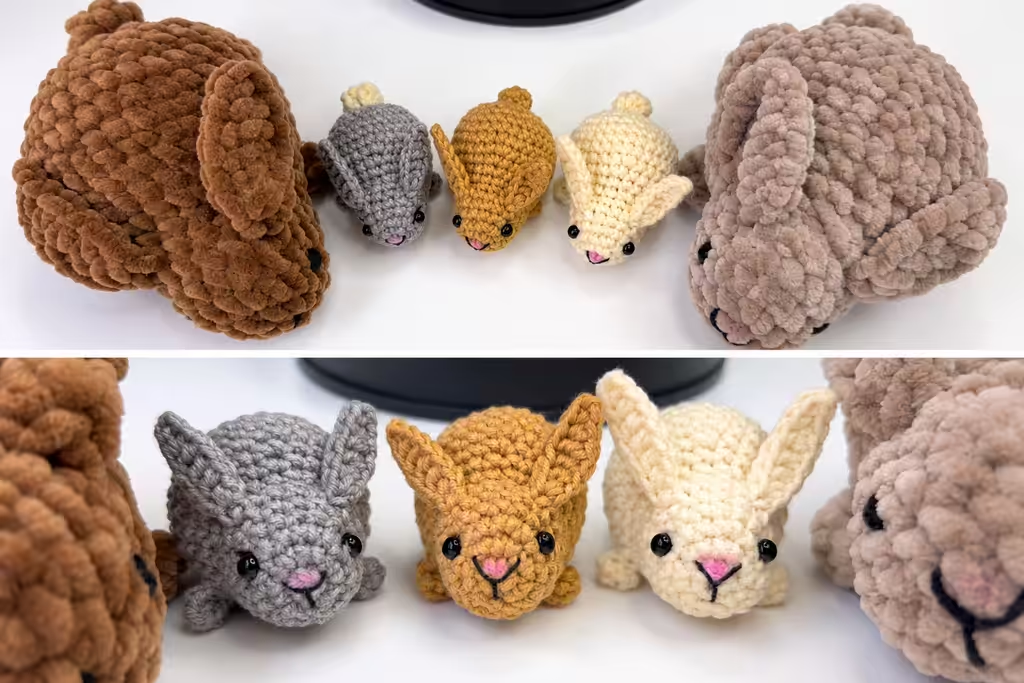
It has a round head, long floppy ears, tiny paws and a fluffy tail. The ears, paws and tail grow straight out of the body as you crochet. This is a beginner-friendly free crochet bunny pattern that works up fast. The pattern was designed by Gul’s Cozy Crochet, and her video tutorial is at the end of this post.
Why You’ll Love This No-Sew Bunny Pattern
The best thing about this pattern is how clean the finish looks. With no seams to line up, you skip the crooked ears and lopsided limbs that often come with assembled amigurumi. The bunny holds its shape well and feels sturdy in your hand.
It’s also small and quick. Make one in an evening, or batch a few in different colors and you have a whole bunny family. They look cute on a nightstand, a bookshelf or a desk, and they’re easy to tuck into a gift bag. Afficher l’image
This easy crochet bunny also makes a great gift. Think Easter baskets, birthday presents, baby shower favors or a “just because” surprise. It’s quick enough to whip up last minute and sweet enough that people will think you spent days on it. It’s also a good way to practice increases, decreases and working in continuous rounds.
How This No-Sew Amigurumi Bunny Is Made
You start with a magic ring and crochet the head in a spiral, with no joins between rounds. Partway through the head, you add the ears by chaining and working back along the chain. The body comes next, with the front paws and back paws made the same way as the ears. A simple tail finishes it off. Because every part is built into the body, there’s almost nothing to sew at the end.
Pattern at a Glance
- Head and body worked in one piece, starting from a magic ring
- Ears, front paws, back paws and tail all made as you go
- Practically no sewing, just weaving in ends
- Easy to resize with a different yarn weight and hook
- Great for beginners, gifts and plushie collections
Pattern Notes
- Work in continuous rounds. Don’t join at the end of each round.
- Mark the first stitch of every round with a stitch marker.
- Change your yarn and hook size to make a bigger or smaller bunny.
- Stuff firmly, but don’t overstuff, or the stitches will stretch and show the filling.
Skill Level
Beginner. You only need basic stitches, increases and decreases. Every round is written out.
Materials
- Yarn:
- Light (3) / DK cotton blend for a mini bunny
- Super bulky (6) chenille or plush yarn for a bigger, squishier bunny
- Hook:
- 2.5 mm for DK yarn
- 4.0 mm for chunky yarn, or whatever gives you tight stitches
- Safety eyes: 4 mm (or embroider the eyes with black yarn or thread)
- Stuffing: polyester fiberfill
- Notions: yarn needle, stitch marker, scissors
Finished Size
- Small bunny (DK yarn): about 2–3 in (5–7 cm)
- Large bunny (chunky yarn): about 5–6 in (12–15 cm)
Gauge
Gauge isn’t important here. Just use a hook small enough to make firm, tight stitches so the stuffing doesn’t peek through.
Abbreviations (US Terms)
| Abbreviation | Meaning |
|---|---|
| MR | Magic ring |
| ch | Chain |
| sl st | Slip stitch |
| sc | Single crochet |
| inc | Increase (2 sc in the same stitch) |
| dec | Invisible decrease |
| hdc | Half double crochet |
| dc | Double crochet |
| tr | Treble crochet |
| st(s) | Stitch(es) |
| Rnd | Round |
Special Stitches
Invisible decrease (dec): Insert your hook into the front loops of the next 2 stitches. Yarn over and pull up a loop, then yarn over and pull through both loops on the hook.
Treble cluster (for the tail): Yarn over twice, insert your hook in the stitch, yarn over and pull up a loop, then [yarn over, pull through 2 loops] twice. Repeat in the same stitch for each extra treble in the cluster. Finish with a yarn over and pull through all the loops on the hook.
No-Sew Crochet Bunny Pattern
Head
- Rnd 1: MR, 6 sc into the ring. (6 sts)
- Rnd 2: inc in every stitch around. (12 sts)
- Rnd 3: (1 sc, 1 inc) × 6. (18 sts)
- Rnd 4: sc in each stitch around. (18 sts)
Ears
- Rnd 5: 7 sc.
- First ear: ch 8. Starting in the 2nd chain from the hook and working into the back bumps: 1 sc, 1 hdc, 3 dc, 1 hdc, 1 sc.
- 4 sc along the head.
- Second ear: ch 8. Starting in the 2nd chain from the hook: 1 sc, 1 hdc, 3 dc, 1 hdc, 1 sc.
- 7 sc to finish the round. (18 head sts)
- Rnd 6: sc in each stitch around, skipping both ears. (18 sts)
- Rnd 7: sc in each stitch around. (18 sts)
Now is the time to insert the safety eyes and embroider the little nose.
Body
- Rnd 8: 3 sc, (1 sc, 1 inc) × 6, 3 sc. (24 sts)
Front Paws
- Rnd 9:
- 3 sc.
- First paw: ch 5, turn, skip 2 chains, then 3 hdc starting in the 3rd chain from the hook.
- 18 sc along the body.
- Second paw: ch 5, turn, skip 2 chains, then 3 hdc.
- 3 sc to finish the round.
Shaping the Body
- Rnd 10: 7 sc (skip the front paw), inc, 4 sc, inc, 4 sc, inc, 6 sc. (27 sts)
- Rnd 11: 8 sc, inc, 4 sc, inc, 4 sc, inc, 8 sc. (30 sts)
- Rnds 12–14: sc in each stitch around. (30 sts)
Back Paws and Decreases
- Rnd 15:
- 3 sc.
- First back paw: ch 6, then starting in the 3rd chain from the hook, 4 hdc.
- 1 dec, then (3 sc, 1 dec) × 4.
- 2 sc.
- Second back paw: ch 6, then starting in the 3rd chain from the hook, 4 hdc.
- 1 sc, 1 dec to finish the round. (24 sts)
- Rnd 16: (1 dec, 2 sc) × 6. (18 sts)
- Stuff the head and body now.
- Rnd 17: (1 dec, 1 sc) × 6. (12 sts)
- Add a little more stuffing if needed.
- Rnd 18: 6 dec, then sl st to close. (6 sts)
Tail
- Move your loop to a stitch at the back of the bunny.
- Ch 3, work a 3-tr cluster in one stitch, then a 2-tr cluster in the next stitch.
- Ch 3 and sl st into the body.
- Cut the yarn, weave in the end, and sew the tail down only if it needs it.
Finishing
- Weave in all yarn tails.
- Gently shape the ears and make sure the tail sits securely.
- Add a bit more stuffing if the body feels soft, then close up.
Video Tutorial
Prefer to follow along on screen? Watch the full video by Gul’s Cozy Crochet and crochet this bunny with her, round by round.
Final Thoughts
Once you’ve made your first no-sew crochet bunny, you’ll probably want to make another. Try soft pastels for spring, a cream bunny with pink inner ears, or a chunky chenille version that’s extra huggable. You can also switch the eyes for embroidered ones if the bunny is for a baby or toddler.
Because the ears, paws and tail are part of the body, the finished bunny is neat and durable. If you enjoyed this pattern, check out our other no-sew amigurumi patterns for more cute little friends.