Skill Level: Beginner
Estimated Time: About 1 hour for the small size and 2 hours for the large size
Looking for a quick and cozy fall crochet project? These easy crochet pumpkins are simple to make and perfect for decorating your home for fall .
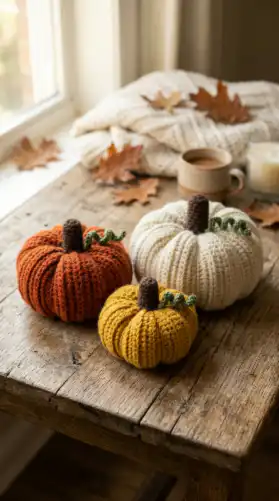
The pumpkin is made from a textured rectangle worked back and forth in single crochet through the back loop only. The rectangle is then sewn into a tube, stuffed, and gathered at both ends. Finally, yarn is wrapped around the pumpkin to create its characteristic rounded ribs.
Make one pumpkin or create a whole collection in different colors and sizes!
Materials
- Worsted-weight yarn
- Approximately 50 yards for the small pumpkin
- Approximately 90 yards for the medium pumpkin
- Approximately 160 yards for the large pumpkin
- Small amount of brown yarn for the stem
- 5 mm (H-8) crochet hook
- Tapestry needle
- Polyester fiberfill
- Scissors
Abbreviations
- ch = chain
- sc = single crochet
- BLO = back loop only
- MR = magic ring
- st = stitch
- RS = right side
This pattern uses US crochet terminology.
Gauge
Approximately 14 sc × 19 rows in BLO = 4 × 4 inches.
Gauge is not critical for this project, but it will affect the finished size. A slightly tighter fabric will create a firmer pumpkin that holds its shape better.
Finished Sizes
| Small | Medium | Large | |
|---|---|---|---|
| Foundation chain | 14 | 18 | 21 |
| Stitches per row | 13 | 17 | 20 |
| Total rows | 60 | 75 | 90 |
| Approx. height | 3¾ in | 4¾ in | 5¾ in |
| Approx. circumference | 12¾ in | 15¾ in | 19 in |
| Approx. diameter | 4 in | 5 in | 6 in |
| Rib sections | 6 | 6 | 8 |
Good to know: The foundation chain determines the height of the pumpkin, while the number of rows determines its circumference.
Because crochet tension varies from person to person, the finished dimensions may differ slightly.
Crochet Pumpkin Body
The pumpkin body is worked as a simple textured rectangle.
Foundation Chain
Chain the number of stitches indicated for your chosen size.
Row 1
Sc in the 2nd ch from the hook and in each chain across.
Turn.
Row 2
Ch 1.
Working in BLO, sc in each stitch across.
Turn.
Rows 3–60: Small
Repeat Row 2 until you have completed 60 rows.
Fasten off, leaving a yarn tail approximately 24 inches long for sewing.
Rows 3–75: Medium
Repeat Row 2 until you have completed 75 rows.
Fasten off, leaving a yarn tail approximately 24 inches long for sewing.
Rows 3–90: Large
Repeat Row 2 until you have completed 90 rows.
Fasten off, leaving a yarn tail approximately 24 inches long for sewing.
You should now have a long, ridged rectangle.
The ridges created by working in BLO will become the subtle texture of your pumpkin.
Assemble the Pumpkin
1. Join the Rectangle
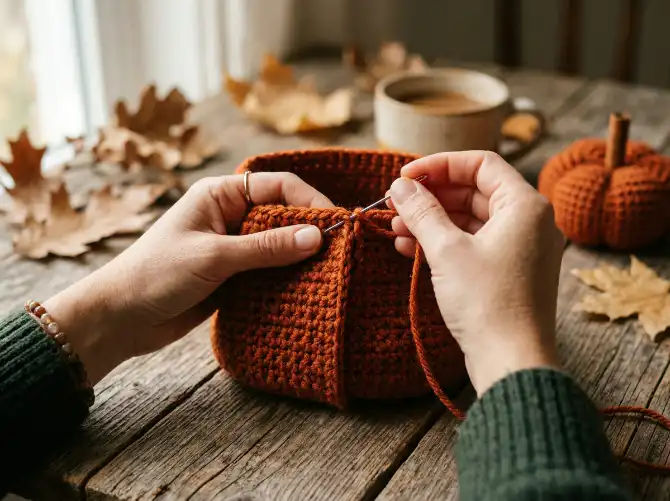
Lay your crocheted rectangle flat with the textured side facing outward.
Bring the two short edges together.
Using the long yarn tail and your tapestry needle, whip stitch the two short edges together.
This creates a tube.
Secure the yarn and weave in the end.
2. Close the Bottom
Cut a separate piece of yarn long enough to comfortably sew around the opening.
Thread it onto your tapestry needle.
Working approximately ¼ inch from the edge, make a running stitch all the way around the opening.
Pull the yarn gently but firmly to gather the opening completely.
Secure with a knot and hide the yarn tail inside the pumpkin.
3. Add the Stuffing
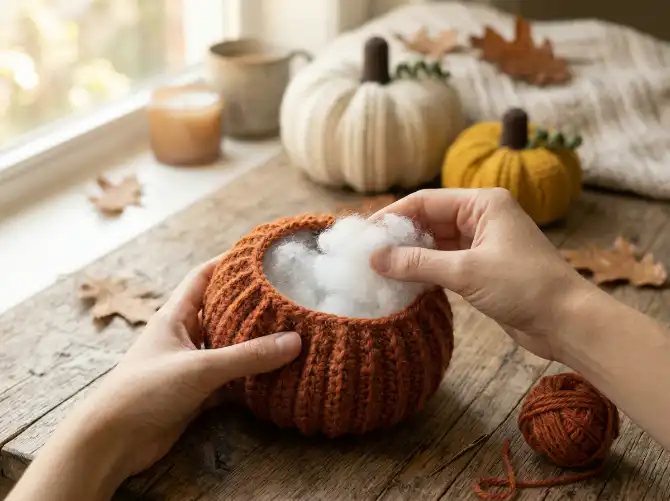
Turn the tube right side out if necessary.
Fill the pumpkin with polyester fiberfill.
Add the stuffing gradually and distribute it evenly.
The pumpkin should feel firm and plump, but avoid overstuffing it. If the fabric becomes stretched and the stuffing is visible between the stitches, remove a little filling.
4. Close the Top
Repeat the same running-stitch technique around the remaining opening.
Pull the yarn to gather the top closed.
Secure firmly and hide the yarn tail inside the pumpkin.
At this stage, you should have a basic round pumpkin shape.
Create the Pumpkin Ribs
This step gives the pumpkin its classic shape.
For best results, use a long piece of yarn in the same color as the pumpkin.
Step 1
Cut a piece of yarn approximately three times the circumference of your pumpkin.
Thread it onto your tapestry needle.
Step 2
Insert the needle through the center of the bottom of the pumpkin and bring it out through the center of the top.
Pull the yarn firmly enough to create a small indentation in the center.
Do not pull so tightly that you flatten the pumpkin completely.
Step 3
Wrap the yarn around the outside of the pumpkin, following a straight line from the top center to the bottom center.
Bring the needle through the center again and back out through the top.
Pull gently to create the first pumpkin rib.
Step 4
Repeat the process, spacing each wrap evenly around the pumpkin.
Each complete wrap creates one recessed section and separates two pumpkin ribs.
Follow the number of rib sections shown in the size chart:
- Small: 6 sections
- Medium: 6 sections
- Large: 8 sections
Step 5
When all the ribs are formed, pull the yarn firmly enough to give the pumpkin a defined shape.
Secure the yarn at the top and hide the remaining tail inside the pumpkin.
Tip: Don’t make every rib perfectly identical. Slight differences in tension can make your pumpkin look more natural and handmade.
Crochet Pumpkin Stem
Use brown yarn for the stem.
Small & Medium Stem
Round 1: Make a magic ring and work 6 sc into the ring. (6)
Rounds 2–5: Sc in each stitch around. (6)
Fasten off, leaving a long yarn tail.
Add a small amount of fiberfill to the stem if desired.
Large Stem
Round 1: Make a magic ring and work 6 sc into the ring. (6)
Rounds 2–7: Sc in each stitch around. (6)
Fasten off, leaving a long yarn tail.
Lightly stuff the stem.
Using the yarn tail and tapestry needle, sew the stem securely to the center of the pumpkin.
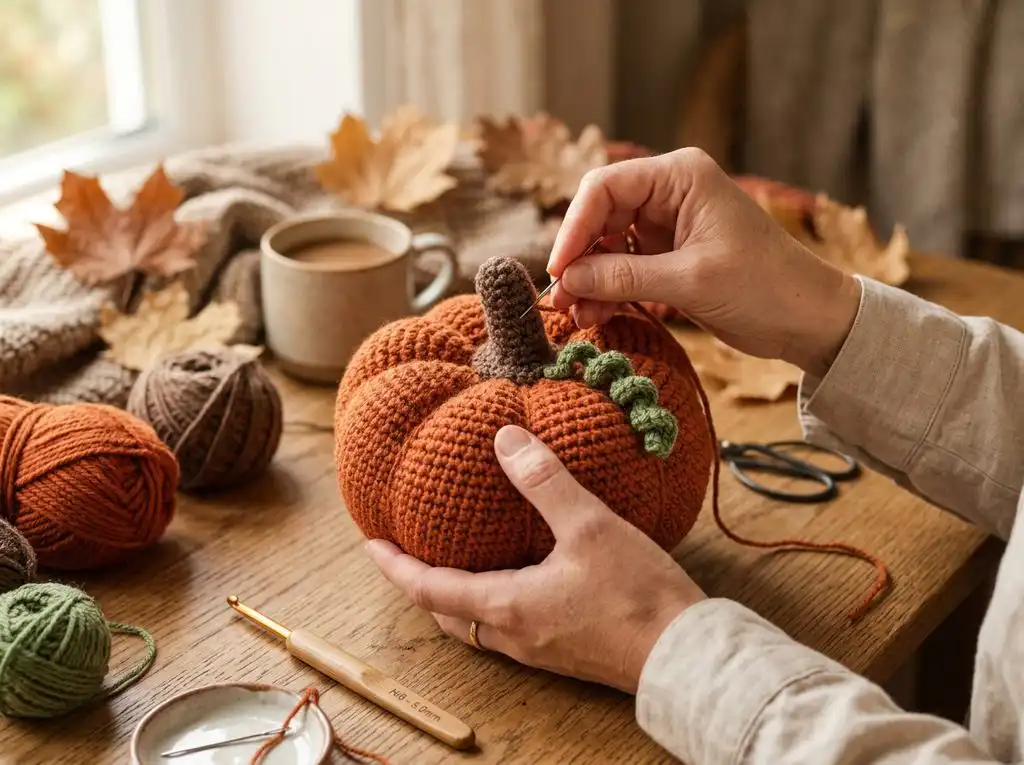
Optional Curly Vine
Add a little crocheted vine for an extra fall-inspired detail.
Using green or brown yarn:
Chain 20.
Starting in the second chain from the hook, work 2 sc in each chain across.
The piece will naturally curl into a spiral.
Fasten off and leave a long tail.
Sew the vine next to the stem.
For a smaller or tighter curl, use fewer chains.
Finishing Your Crochet Pumpkin
Weave in any remaining yarn ends.
Use your hands to gently shape the pumpkin and adjust the stuffing until you are happy with its shape.
You can make these pumpkins in traditional orange, or experiment with different autumn-inspired colors such as:
- Cream
- Rust
- Mustard
- Sage green
- Burgundy
- Brown
- Terracotta
Make several different sizes and arrange them together on a fall table, shelf, mantel, or tiered tray.
They also make lovely handmade gifts for friends and family.
More Crochet Pumpkin Ideas
Once you are comfortable with the basic pattern, try experimenting with:
- Different yarn weights
- Velvet yarn for a softer pumpkin
- Variegated yarn for a unique color effect
- Longer stems
- Different numbers of ribs
- Larger pumpkins for seasonal home décor
The pattern is easy to customize, so you can create pumpkins in almost any size or color combination.
Frequently Asked Questions
Can I use a different yarn weight?
Yes. You can use a different yarn weight, but your finished pumpkin will be a different size. Adjust your hook size accordingly and make a small swatch first.
Do I have to make the ribs?
No. The pumpkin will still look cute without the additional wrapping, but the ribs give it a much more recognizable pumpkin shape.
Can I make the pumpkin bigger?
Absolutely. To make a larger pumpkin, increase the foundation chain to make the pumpkin taller and add more rows to increase its circumference.
What is the best stuffing for crochet pumpkins?
Polyester fiberfill works well because it is lightweight, easy to shape, and keeps the pumpkin plump.
Can I sell pumpkins made from this pattern?
Yes, you may sell finished pumpkins that you personally make from this pattern. Please do not sell, redistribute, or republish the written pattern itself.