Some projects just make you smile the second you finish them. This no-sew frog is one of them. With its squishy green body, soft white belly, and tiny bobbled legs, it looks like it hopped straight out of a cottage garden.
The best part? There’s no sewing at all. No attaching limbs, no wobbly heads, no crooked eyes sewn on at the last minute. Everything is worked in one flow, so you get a neat, sturdy amigurumi frog with far less finishing.
If you’ve ever put a half-finished plushie in a drawer because you dreaded the assembly, this pattern is for you.
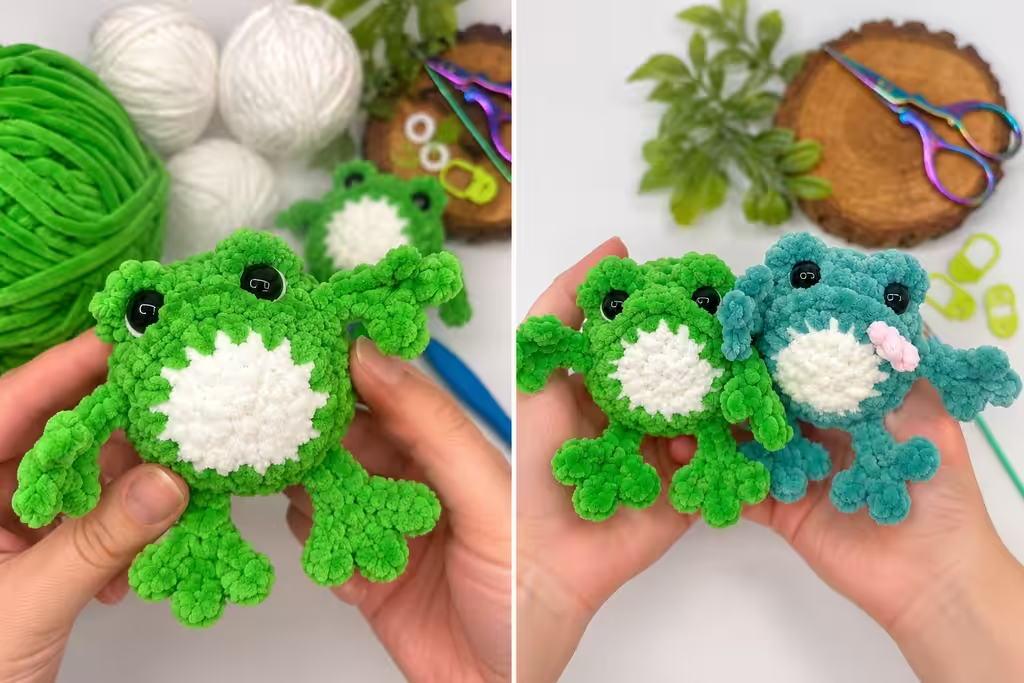
Why You’ll Love This Frog Pattern
- No sewing required. The pieces are built together as you crochet, so the finishing is quick and clean.
- Beginner-friendly. You only need basic amigurumi skills, and the full video tutorial shows every step.
- Quick to make. It’s small enough to finish in an evening or a relaxed weekend.
- Super cuddly. Chunky, plush-style yarn gives it that irresistible squishy texture.
- Great for gifting. It’s cute, small, and easy to make in several colors.
What You’ll Need
(Check the video description for the exact sizes and amounts used in the tutorial.)
- Chunky chenille or velvet-style yarn in green (body and legs)
- A little white yarn (belly)
- Black safety eyes
- Crochet hook (the one that matches your yarn)
- Fiberfill stuffing
- Stitch marker
- Scissors
- Optional: a second color for a mini frog family (teal, mint, or lime all look adorable)
Tips for a Perfect Fluffy Frog
1. Choose the right yarn. Chenille-style yarn gives the frog its plush look, but the stitches can be hard to see. Work in good light and go slowly.
2. Keep your stitches tight. Tight stitches stop the stuffing from peeking through. If you usually crochet loosely, try going down one hook size.
3. Stuff as you go. With a no-sew design, you can’t open the body up later. Add stuffing a little at a time so the shape stays smooth and even.
4. Place the safety eyes carefully. Position them before you close the piece, and check the spacing from the front. Eyes set slightly wider apart give a sweeter, more “kawaii” face.
5. Use a stitch marker. Marking the start of each round keeps you from losing your place, especially with fuzzy yarn.
Ways to Use Your Crochet Frog
This little guy is more than a toy:
- A desk buddy or shelf decoration
- A handmade gift for frog lovers and plant lovers
- A spring or garden-themed display
- A bag charm or keychain (just add a small loop)
- A craft fair item, since it sells well in a full set of colors
Make a Whole Frog Family
Once you’ve made one, you’ll want more. Try different shades:
- Classic bright green with a white belly
- Soft teal or sea green for a calm, pastel look
- Mint and cream for a baby-nursery feel
A little row of frogs in different colors looks fantastic in photos, which is great if you plan to sell or share your work.
Frequently Asked Questions
Is this frog pattern really no-sew?
Yes. The body and limbs are crocheted in one continuous flow, so you don’t need to sew the main parts together.
Is it good for beginners?
Yes. If you know how to make a magic ring, single crochet, and increases and decreases, you can follow along. The video shows each step clearly.
Can I use a different yarn?
Yes. Cotton or acrylic works well too. Just keep in mind that the finished size will change with the yarn and hook you use.
Are safety eyes okay for kids?
Safety eyes are secure when properly attached, but for babies and toddlers, embroider the eyes instead.
Watch the Full Video Tutorial
Ready to start? The full step-by-step tutorial is below. Grab your yarn, press play, and crochet along with it. You’ll have your own little frog in no time.
Video tutorial by Darling Maple Designs. All credit for the design goes to them. Don’t forget to like their video and subscribe to their channel!