Free crochet pattern · Intermediate
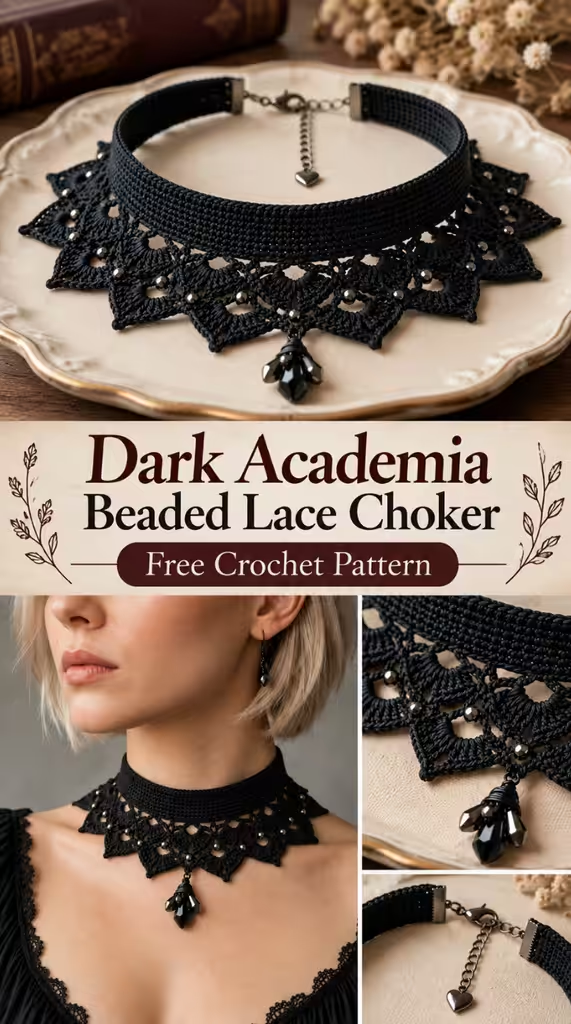
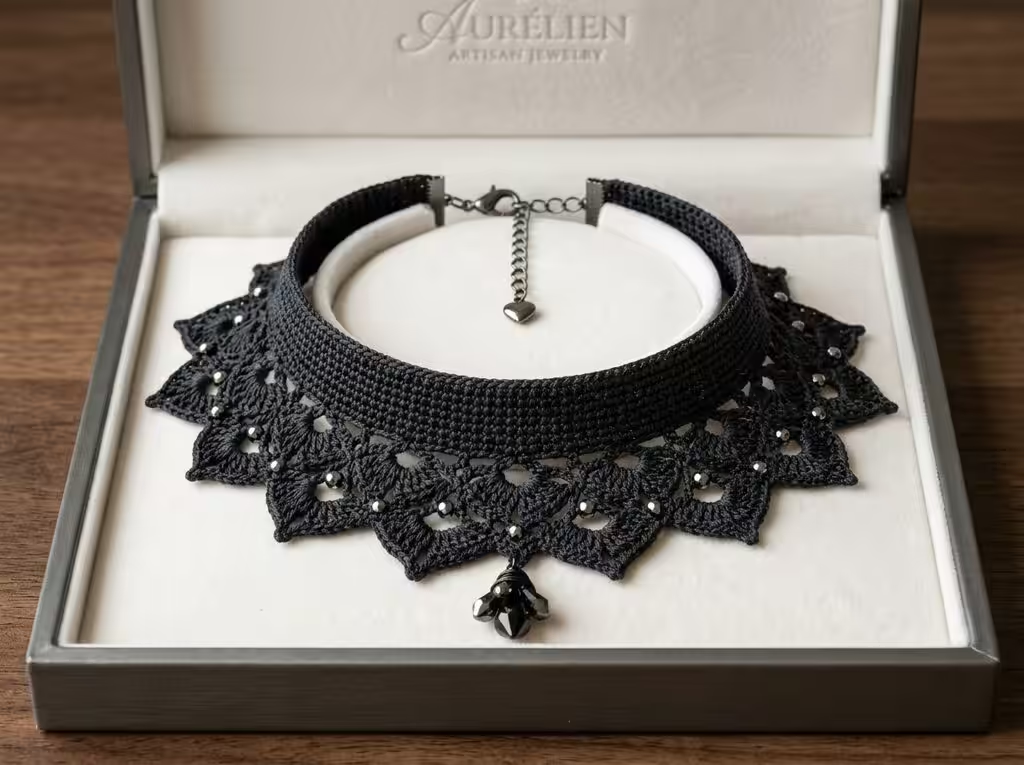
If you’ve been searching Pinterest for a moody, romantic accessory that looks like it belongs in a Victorian jewelry box, this one’s for you. This beaded lace choker is worked in fine black thread, finished with a cascade of dark seed beads and a single sparkling drop at the center. It reads equal parts gothic and elegant — perfect for layering under a collar, wearing to a fall wedding, or gifting to the dark-academia lover in your life.
The good news? Nothing about this pattern is actually hard. It’s built from two simple pieces — a sturdy single crochet band and a lace edging worked in repeating points — plus a few beads slid into place as you go. If you can single crochet and chain, you can make this.
Why You’ll Love This Pattern
- No complicated bead crochet. Beads are pre-strung on your thread and simply pulled into place stitch by stitch — no special bead-crochet technique required.
- Fully adjustable. Add or remove lace repeats to size the choker up or down.
- Fast for thread crochet. Most makers finish in an evening or two.
- Stunning payoff. Seven lace points, a beaded edge, and a pendant drop make this look far more advanced than it is.

Skill Level & Time
Skill level: Intermediate (comfortable with shells, picots, and basic jewelry findings)
Time: 4–6 hours total, including bead prep and finishing
Finished Size
- Length: 13 in / 33 cm, extending to about 15 in / 38 cm with the extender chain
- Band height: 1.5 in / 3.8 cm
- Lace drop: roughly 2.25 in / 5.7 cm from band to lace tip
- Pendant drop: adds about 1 in / 2.5 cm more at center front
Materials
- Size 10 black crochet thread (cotton or mercerized cotton), approx. 150 yds / 137 m
- US Steel Hook, Size 7 (1.65 mm)
- 80–100 black or hematite size 6/0 seed beads
- Beading needle or twisted-wire needle
- 1 lobster clasp, gunmetal finish (12–14 mm)
- 2 flat ribbon crimp ends, gunmetal finish
- 1 extender chain (approx. 2 in / 5 cm), gunmetal
- 1 small charm of your choice
- 1 wire-wrapped crystal or jet pendant drop (20–25 mm), with a top loop
- Round-nose and flat-nose pliers
- Tapestry needle
- T-pins and a blocking board
- Small spray bottle with water
- Jewelry glue (optional)
Yarn tip: stick to a smooth, mercerized size 10 cotton thread. Fuzzier threads blur the lace detail, and anything heavier will make the band too stiff to sit right against the neck.
Gauge
18 sc x 20 rows = 2 in / 5 cm square, blocked, with the Size 7 steel hook.
Swatch before you start — with thread this fine, being even one stitch off per inch can throw your finished length off by a full inch.
Abbreviations (US Terms)
- bead-ch — bead chain: slide a bead up, then complete the chain
- ch — chain
- ch-sp — chain space
- dc — double crochet
- hdc — half double crochet
- RS / WS — right side / wrong side
- sc — single crochet
- sk — skip
- sl st — slip stitch
- st(s) — stitch(es)
- t-ch — turning chain
- tr — treble crochet
- yo — yarn over
Special Stitches
Bead-sc: Insert hook into the stitch, pull up a loop (2 loops on hook), slide a bead snug against the back of the work, yarn over and pull through both loops.
Shell (sh): 5 dc worked into the same stitch or space.
Picot: Ch 3, sl st into the first chain made.
Beaded picot: Ch 1, slide a bead up, ch 1, ch 1 again, sl st into the first chain made.
V-stitch: (dc, ch 2, dc) into the same stitch or space.
Before You Start
- String about 85 beads onto your thread before beginning the lace section — do this all at once with a beading needle.
- The band and lace edging are worked as a flat rectangle, not joined in the round; the two short ends stay open for the clasp hardware.
- The lace repeat is 16 stitches and makes one point; to resize, add or remove full 16-stitch multiples (6 repeats/102 ch for a 12 in choker, 8 repeats/134 ch for 14 in).
- Turning chains count as your first stitch throughout the band.
Pattern
Part 1 — The Band
Leaving a 6 in tail, ch 119.
Row 1 (RS): Sc in 2nd ch from hook and in each ch across. Turn. (118 sc)
Rows 2–13: Ch 1, sc in each st across. Turn. (118 sc)
Row 14 (WS): Ch 1, sc in each st across. Do not turn, do not fasten off. (118 sc)
Check yourself: the band should sit at roughly 13 in / 33 cm wide and 1.5 in / 3.8 cm tall, flat with no curling. If it’s curling, a quick wet block now will fix it before you move on.
Part 2 — Top Edge
Rotate your work so the foundation-chain edge is at top, RS facing.
Join with sl st at the right edge. Ch 1, sc evenly across, working one sc into each foundation chain stitch (118 sc). Fasten off, weave in the end.
Part 3 — Lace Edging
Thread your beads now if you haven’t already.
With RS facing, working into the bottom edge of Row 14, join with sl st in the 4th st from the right (leaving 3 sts unworked for the clasp hardware).
Setup row: Ch 1, sc in the join, sc in each of the next 111 sts, leaving the last 3 sts unworked. Turn. (112 sc — that’s 7 full 16-stitch repeats.)
From here, work your seven shell-and-picot motifs across the row, dropping in your bead-sc and beaded picots at the tip of each point as you go, until all 7 points are complete.
Finishing
Weave in every end. Pin the piece flat on your blocking board, mist lightly, and shape each lace point before letting it dry fully.
Slide each short end into a crimp finding and close firmly with flat-nose pliers (a dab of jewelry glue inside adds extra hold). Attach the clasp to one end, the extender chain and charm to the other.
For the pendant: hook the top loop through the picot at your center point (point 4 of 7) and close with round-nose pliers or a jump ring.
Tips for a Clean Finish
- Work somewhere well-lit — thread crochet stitches are tiny and easy to lose track of.
- New to bead-stringing? Practice on scrap thread first.
- Keep tension even in the band; loose spots will make it ripple.
- Push each bead firmly to the back before finishing the stitch, or it’ll shift later.
How to Style It
This one looks best against a plain neckline — think a simple black top or dress that lets the lace take center stage. Swept-up hair shows off the full design. Slide the extender chain to wear it higher or lower depending on the look you’re going for.