If there is one thing that holds many beginners back from making amigurumi plushies, it is the dread of sewing all the tiny pieces together. Trying to pin miniature limbs evenly, sewing through stuffing, and worrying about asymmetrical ears or arms can turn a fun project into a frustrating chore.
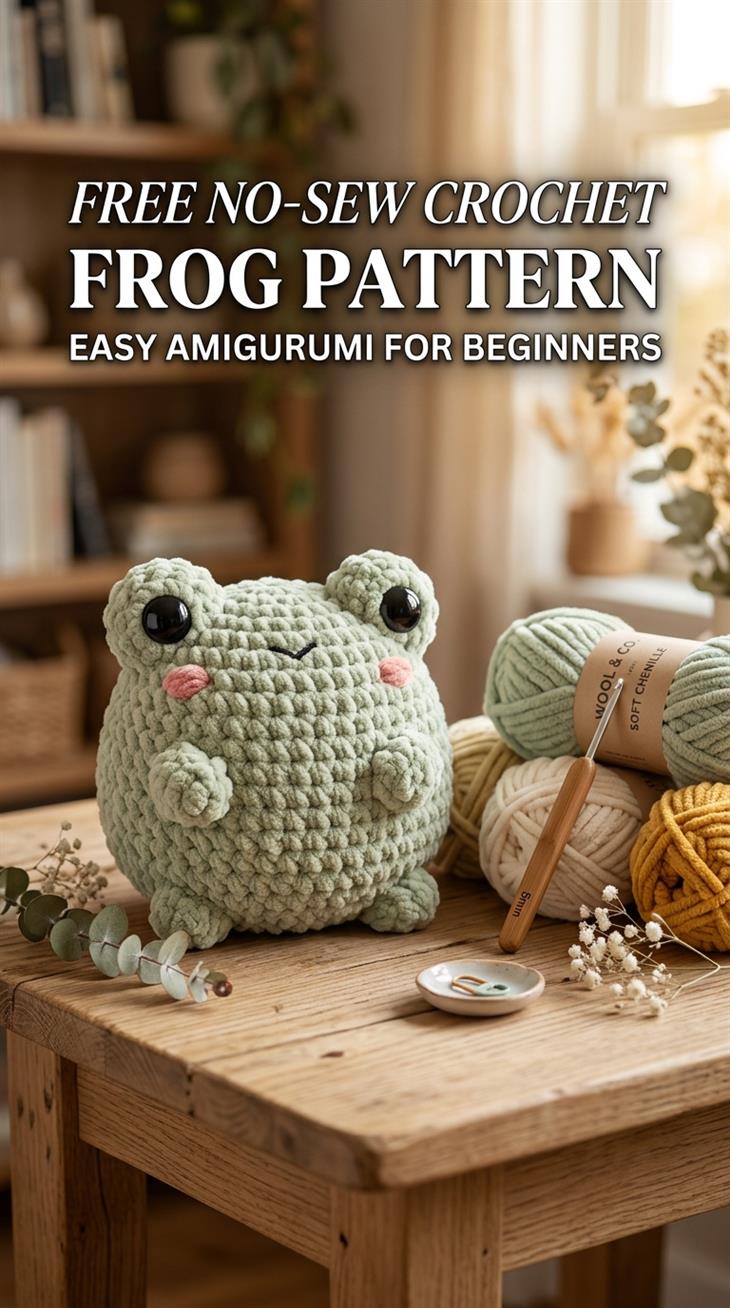
Enter the magic of no-sew crochet! This sweet, chubby little frog is worked entirely in one seamless piece from bottom to top. The legs, arms, and even the raised eye-sockets are crocheted directly into the body using clever bobble stitches and popcorn shaping. That means zero needle sewing (except for weaving in your final yarn tail!).
Whether you are whipping up inventory for a craft market, making adorable bag charms, or just looking for an instant-gratification 30-minute make, this free no-sew crochet frog pattern will be your new favorite go-to.
📌 Pin this pattern to your Pinterest Amigurumi Board to make later:
Why You’ll Love Making This No-Sew Frog
- 100% No-Sew Construction: Everything is crocheted into the body in continuous rounds. When you fasten off at the top, you are completely finished!
- Ultra-Fast (Under 30 Minutes): From magic ring to final squeeze, you can complete one frog in just 25–35 minutes.
- Scrap-Friendly: Requires less than 25 grams of super chunky yarn, making it the ultimate scrap-buster.
- Best-Selling Market Favorite: Crafters and market vendors adore this pattern because it has high profit margins and flies off the table.
Finished Size
When made with Super Bulky #6 chenille yarn and a 4.5 mm hook, the finished frog measures approximately 3 inches wide by 3.5 inches tall (7.5 cm x 9 cm) — perfectly palm-sized and squishy.
Materials You’ll Need
- Yarn: Super Bulky / Chenille Velvet Yarn (Category 6, such as Himalaya Dolphin Baby, Premier Parfait Chunky, or Bernat Blanket) in Sage Green (approx. 25–30 yards) and a tiny scrap of Pastel Pink for blush embroidery.
- Crochet Hook: 4.5 mm or 5.0 mm hook (keep tension snug to ensure polyfill stuffing does not peek through).
- Safety Eyes: 10 mm or 12 mm black plastic safety eyes (or black embroidery yarn for baby-safe plushies).
- Fiberfill Stuffing: High quality polyester toy stuffing (a small handful).
- Yarn Needle & Scissors: For fastening off and embroidering the smile/cheeks.
- Stitch Marker: Essential since this pattern is worked in continuous spiral rounds.
Stitch Abbreviations (US Terms)
- MR: magic ring
- sc: single crochet
- inc: increase (2 sc in the same stitch)
- dec: invisible single crochet decrease
- Bobble (Foot): 4-dc bobble stitch (yarn over, insert hook into st, yo, pull up loop, yo, pull through 2 loops) 4 times in same st. Yo, pull through all 5 loops on hook. Push bobble toward the outside of work.
- Eye Bump: 5-dc bobble stitch worked into the designated stitch to form the raised eyeball socket.
- sl st: slip stitch
- st(s): stitch(es)
Step-by-Step Written Pattern: No-Sew Frog
Note: Do not join rounds with a slip stitch; work continuously in a spiral. Place your stitch marker in the first stitch of each round.
Starting from the Bottom Base
- Round 1: In green chenille yarn, make a MR and work 6 sc into the ring. Pull gently to close. (6 sts)
- Round 2: Work 2 sc in each st around (inc in all 6 sts). (12 sts)
- Round 3: [1 sc, inc] repeat 6 times. (18 sts)
- Round 4: [2 sc, inc] repeat 6 times. (24 sts)
Working the Back Legs Round
- Round 5 (Legs Round): Sc in next 4 sts, work Bobble (Back Foot) in next st, sc in next 6 sts, work Bobble (Back Foot) in next st, sc in remaining 12 sts. (24 sts, including 2 leg bobbles).
Note: Pop the bobbles outward with your thumb so they form cute little frog feet on the base. - Round 6: Sc in each st around (work normally into the top of each bobble). (24 sts)
- Round 7 (Front Arms Round): Sc in next 5 sts, work 3-dc bobble in next st, sc in next 4 sts, work 3-dc bobble in next st, sc in remaining 13 sts. (24 sts)
- Rounds 8–9: Sc in each st around for 2 rounds. (24 sts each round)
Working the Head & Eye Sockets
- Round 10 (Eyes Round): Sc in next 5 sts, work Eye Bump (5-dc bobble) in next st, sc in next 4 sts, work Eye Bump (5-dc bobble) in next st, sc in remaining 13 sts. (24 sts)
- Round 11: Sc in each st around. (24 sts)
Attaching Safety Eyes & Stuffing
Pause here before closing the top! Insert your 10 mm safety eyes directly into the center of each Eye Bump created in Round 10. Secure tightly with the backing washers from the inside.
Using black embroidery thread or thin yarn, stitch a tiny “v” or curved line between the eyes for the smile. With pink yarn, add a horizontal stitch beneath each eye for rosy blush cheeks.
Firmly stuff the frog body with polyester fiberfill, paying special attention to the base so it sits flat.
Closing the Top Crown
- Round 12: [2 sc, dec] repeat 6 times. (18 sts)
- Round 13: [1 sc, dec] repeat 6 times. (12 sts) — Add any final pinch of stuffing now.
- Round 14: Dec 6 times around. (6 sts)
Fasten off leaving a 6-inch yarn tail. Using your tapestry needle, thread the tail through the front loops of all 6 remaining stitches, pull snug to close the hole tightly, weave the tail through the body, and trim excess yarn.
Creative Variations to Try
- Strawberry Frog: Use coral pink yarn with small yellow embroidered seed specks and green leaf collar.
- Mushroom Hat Frog: Crochet a tiny red granny cap with white dots and stitch it playfully between the eyes.
- Pocket Keychain: Attach a lobster-clasp keychain ring to Round 14 before pulling closed for a cute backpack charm.
Frequently Asked Questions
Can I use regular worsted weight acrylic yarn?
Absolutely! With size 4 worsted weight yarn and a 2.75 mm or 3.0 mm hook, your frog will come out as a mini pocket-sized amigurumi (approx. 1.75 inches tall). Use 6 mm safety eyes instead.
How do I prevent holes in amigurumi stitches?
Always use an invisible decrease (insert hook through the front loops only of both stitches) and drop down 1 to 1.5 hook sizes from the manufacturer’s yarn label recommendation.
Final Thoughts
No-sew crochet is truly one of the most rewarding techniques in the fiber arts world. You get the instant joy of seeing a character come alive round by round without the tedious finishing steps. Make a whole pond of colorful frogs in an afternoon!
Ready to make yours? Pin this pattern to your Pinterest crochet board, and don’t forget to tag @MaisieCrochet with your adorable finished frogs!